 Welcome to iChatAI, a sleek and powerful AI chatbot built using DeepSeek API, designed for seamless integration and intelligent conversations.
iChatAI is a smart, lightweight, and fully customizable AI chatbot application powered by DeepSeek APIs. Designed with user experience in mind, iChatAI brings the power of conversational AI to mobile and web platforms in a clean and intuitive interface
Welcome to iChatAI, a sleek and powerful AI chatbot built using DeepSeek API, designed for seamless integration and intelligent conversations.
iChatAI is a smart, lightweight, and fully customizable AI chatbot application powered by DeepSeek APIs. Designed with user experience in mind, iChatAI brings the power of conversational AI to mobile and web platforms in a clean and intuitive interface
🔗 Check out the live preview of the iChatAI App here on Huawei AppGallery
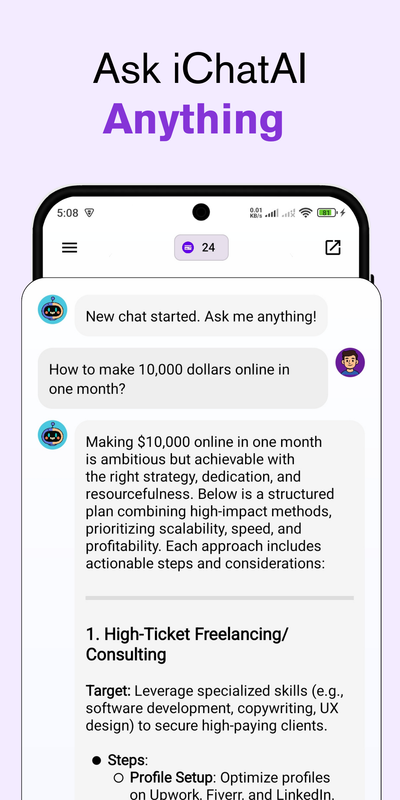
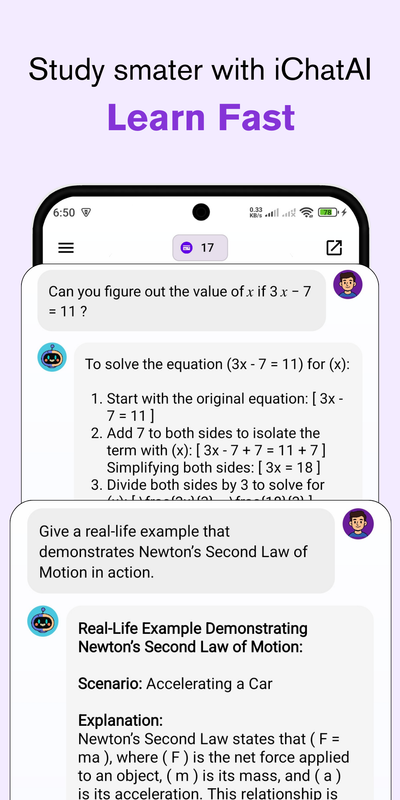
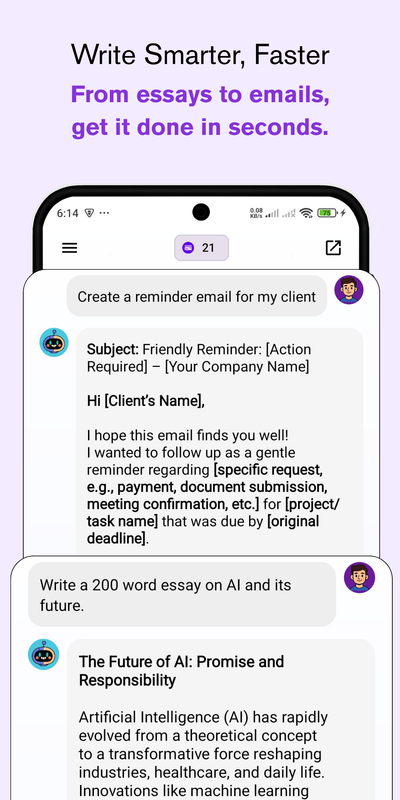
- 🔥 Chat with AI using DeepSeek APIs
- 🧠 Handles real-time conversations
- 💬 Clean UI & responsive design
- 🔧 Easy to configure and deploy
- 🌍 Built with Android Studio using Java
| S 1 | S 2 | S 3 |
|---|---|---|
 |
 |
 |
- Responsive UI/UX with Java
- Project showcase with live demos and GitHub links
- Mobile-friendly layout and user-friendly
- Connected with Firebase
- Admob integrated
You will need to download Git, JDK & Android Studio to run this project.
- Download and install Git from the official website: Git Downloads
- Verify the installation:
git --version
- Download and install JDK from the official website: JDK
- Make sure you have the latest version of Git and JDK on your computer.
- Verify the installation:
java -version
-
Download and install Android Studio from the official website: Android Studio
-
visit Open Router
-
Create a new account
-
Search DeepSeek: R1 0528 (free)
-
Click on API
-
Then click on Create API Key button
-
Name that key
-
Save that API key on a safe place
-
Remember you will not get that API key again
- Click the Fork button at the top-right corner of the page to create your own copy of the repository.
- After forking, open your terminal and run the following commands to clone the repo:
git clone https://github.com/muhammadsufyanzafar/iChatAI--Open-Source-AI-Chatbot-using-API.gitNavigate to the Project Directory 📂 Once the repository is cloned, change your directory to the project folder:
cd ichataiInstall Dependencies ⚙️ From the root directory of your project, install the necessary packages:
npm install- Open Android Studio.
- Click on "Open an Existing Project".
- Navigate to the folder where you cloned/extracted the project.
- Select the project root folder and open it.
- Once the project opens, Android Studio will automatically sync Gradle.
- If it doesn’t, click on File → Sync Project with Gradle Files.
- Go to File → Project Structure → SDK Location.
- Make sure the Android SDK path is correctly set.
- Ensure the project is using the right Gradle & JDK versions.
- Click on Build → Make Project (or press Ctrl+F9 / Cmd+F9).
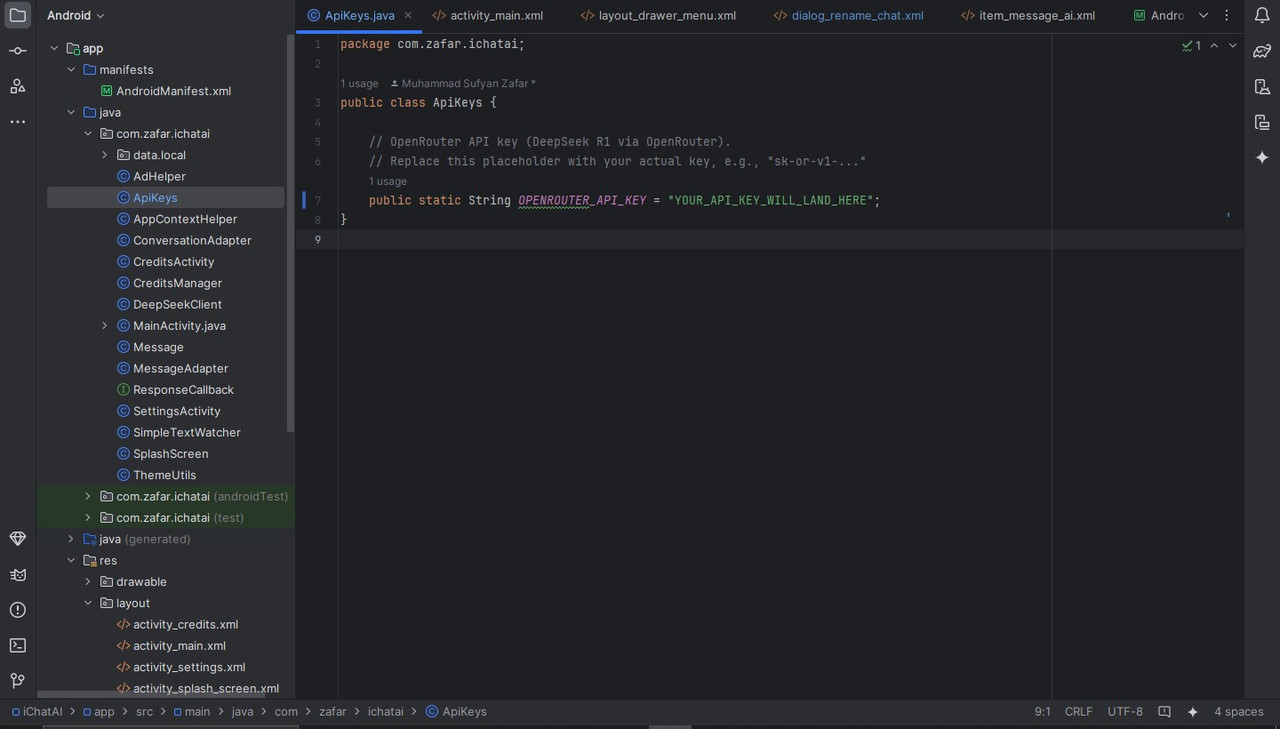
- Navigate to app/src/main/java/com/zafar/ichatai/ApiKeys.java
- Paste your API key there
- Connect a physical device via USB (with USB Debugging enabled) OR
- Use an Android Emulator (create one in AVD Manager).
- Click the green
▶️ Run button in Android Studio.
- Gradle Sync Failed → Check your internet connection, update Gradle, or delete .gradle folder and resync.
- SDK not found → Make sure Android SDK is installed via SDK Manager.
- Emulator issues → Enable virtualization in BIOS, or try a physical device.
- Fork the Project
- Create your Feature Branch (
git checkout -b feature/AmazingFeature) - Commit your Changes (
git commit -m 'Add some AmazingFeature') - Push to the Branch (
git push origin feature/AmazingFeature) - Open a Pull Request
This project is open-source and free to use under the MIT License.
Designed and developed with ❤️ by Muhammad Sufyan Zafar